فيديوهات شرح منظومة سمارت جى اى اس Smart GIS Tutorials Videos
A) Downloading (ASTER and SRTM) NASA Geo DEM Height Files
Open your Internet browser and go to the following URL to Download ASTER Geo DEM
http://www.gdem.aster.ersdac.or.jp/search.jsp
Open your Internet browser and go to the following URL to Download SRTM height files
http://dds.cr.usgs.gov/srtm/version2_1/SRTM3/
http://www.gdem.aster.ersdac.or.jp/search.jsp
Open your Internet browser and go to the following URL to Download SRTM height files
http://dds.cr.usgs.gov/srtm/version2_1/SRTM3/
B) Convert (ASTER and SRTM) NASA Geo DEM Height Files to Tin Shape File
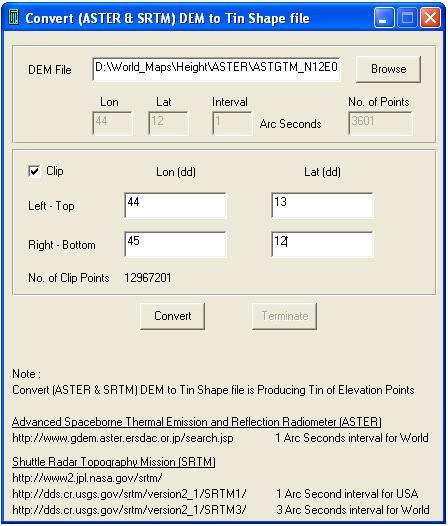
Convert (ASTER & SRTM) DEM to Tin Shape file
Menu → Tools → Convert (ASTER & SRTM) DEM to Tin Shape file
- Download Tiff DEM file from http://www.gdem.aster.ersdac.or.jp/search.jsp
- Select and Enter Clip values of your Area Left Top point and Right Bottom point
- Press Convert
C) Convert ASTER NASA Geo DEM to Color value bmp File
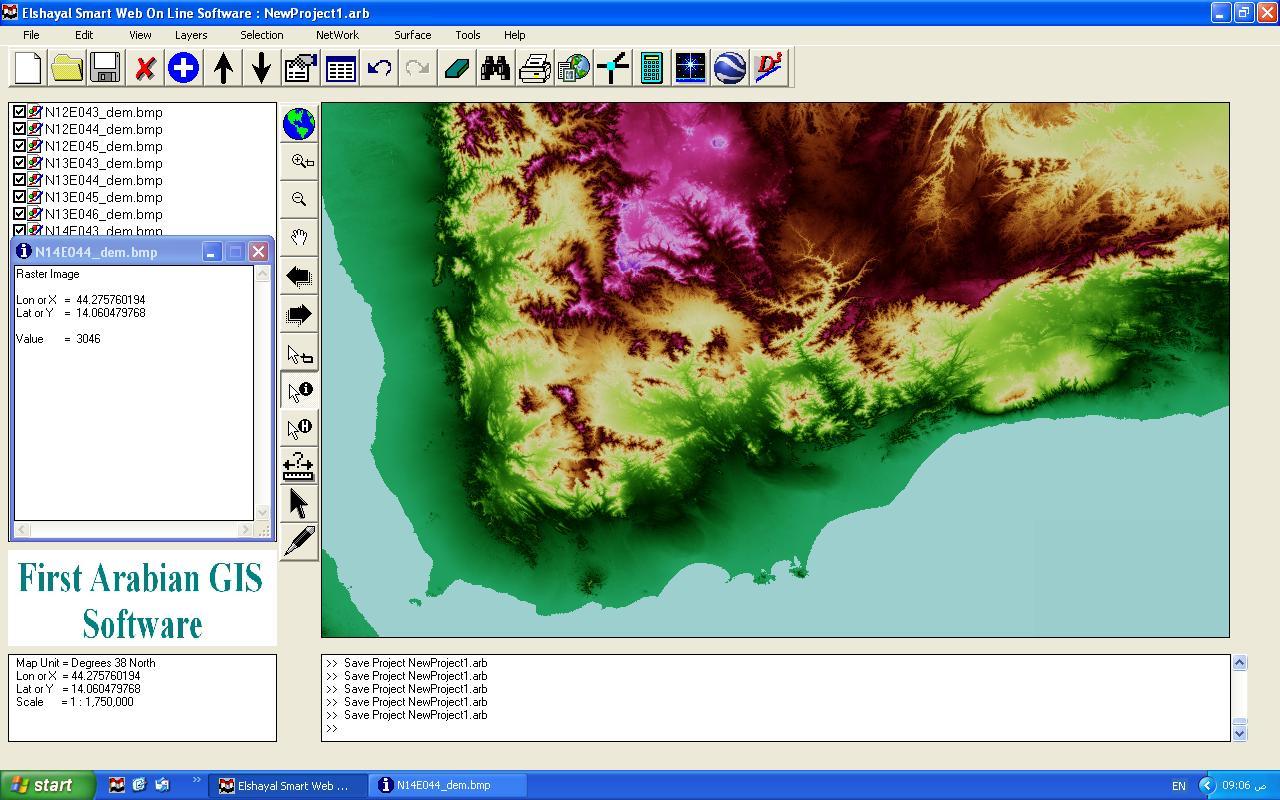
Convert ASTER Geo DEM to Color Value bmp file
Menu → Layers → Add Layer → Files of Type → TIFF → Open
Menu → Layers → Save Layer as → Change the File extension to → BMP → Save
- Open Aster Geo DEM Tiff file
- Save Layer as bmp file
- Press Identify at any point in image to get Elevation value
D) Building Contours from ASTER NASA Geo DEM

Menu → Surface → Building Contours Surface(s) Analysis
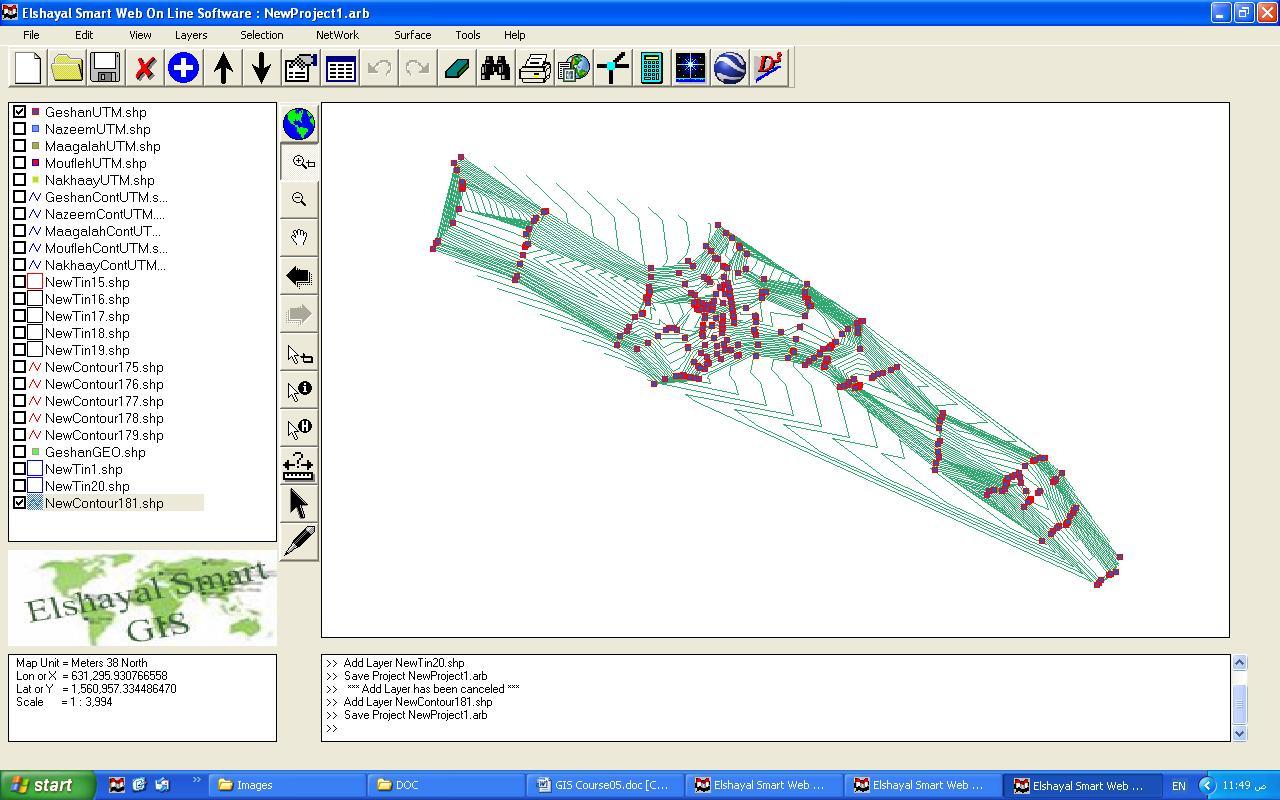
E) Building Tin Surface Analysis

Menu → Surface → Building Tin Surface(s) Analysis
- Select Height Layer Name
- Select Height Criteria (All Feature or Inside Selected Features or Outside Selected Features)
- Select Height Field
- Select Output Tin Surface Shape file name
- Select Build Surface by Delaunay, if elevation points have unequal distances among them.
- Select Build Surface by Matrix, if elevation points have equal distances among them.
- Press Build

F) Building Contours Surface(s) Analysis
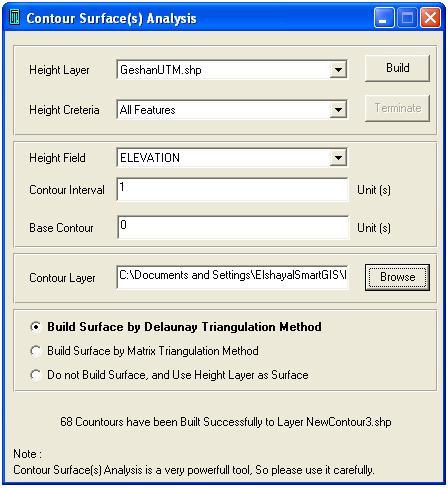
Building Contours Surface(s) Analysis
Menu → Surface → Building Contours Surface(s) Analysis
- Check Use Height Layer as Tin Surface or Not
- Select Height Layer Name
- Select Height Criteria (All Feature or Inside Selected Features or Outside Selected Features)
- Select Height Field
- Select Contour Interval
- Select Base Contour
- Select Output Contour Shape file name
- Select Build Surface by Delaunay, if elevation points have unequal distances among them.
- Select Build Surface by Matrix, if elevation points have equal distances among them.
- Select Do not build Surface, if Height layer is a Tin Surface
- Press Build

G) Converting 2D to 3D Surface Analysis
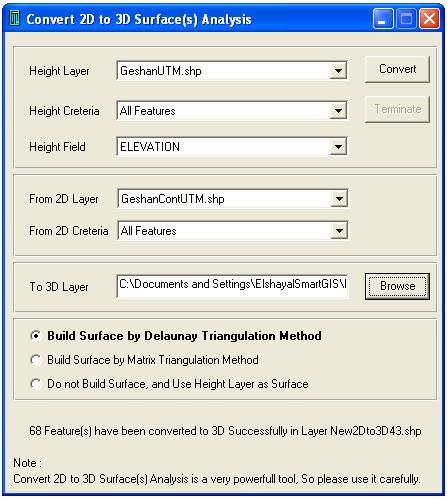
Converting 2D to 3D Surface Analysis
Menu → Surface → Converting 2D to 3D Surface Analysis
- Check Use Height Layer as Tin Surface or Not
- Select Height Layer Name
- Select Height Criteria (All Feature or Inside Selected Features or Outside Selected Features)
- Select Height Field
- Select Destination 2D GIS Shape File
- Select Criteria of the Destination 2D GIS Shape File
- Select Output 3D Shape file name
- Select Build Surface by Delaunay, if elevation points have unequal distances among them.
- Select Build Surface by Matrix, if elevation points have equal distances among them.
- Select Do not build Surface, if Height layer is a Tin Surface
- Press Convert
H) Calculating Area and Volume of Surface(s)

Calculate Area and Volume of Surface(s)
Menu → Surface → Calculate Area and Volume of Surface(s)
- Check Use Height Layer as Tin Surface or Not
- Select Height Layer Name
- Select Height Criteria (All Feature or Inside Selected Features or Outside Selected Features)
- Select Height Field
- Select Height of the Calculating Plane
- Select above Plane or Below Plane
- Select Build Surface by Delaunay, if elevation points have unequal distances among them.
- Select Build Surface by Matrix, if elevation points have equal distances among them.
- Select Do not build Surface, if Height layer is a Tin Surface
- Press Calculate
تسجيل منظومة سمارت جى اى اس ايتيدا Smart GIS Registeration in ITIDA
شهادات منظومة سمارت جى اى اس Smart GIS Certificates